Two instruments · one performance
Split mode
Play two independent instruments: A on the left half of the pads reads stereo lanes 1–2; B on the right reads lanes 3–4. Each side has sixteen pads, four source voices, its own engine, keyboard, envelope, stack path, and private insert effects.
Both sides may use the same engine. For example, put a slow Motion texture on A and a faster Motion rhythm on B, then blend between them. Basic playing covers the default Single instrument.
Choose an instrument mode
Hold Capture and press Menu → choose Instrument Mode → click the main encoder. Turn or use Up/Down to choose Single, Split, Shared Dual, or Quad; click to apply. Back returns to Pages. Stop audio and performance recording before changing mode. Changing mode stops the current data loop and releases its notes.
Start a Split performance
- Choose Split from Instrument Mode. Afterward, Outside the clip and chain editors, Copy switches between Single and the last chosen dual mode. The first time, both sides inherit your current engine settings. Existing audio stays in its four lanes.
- Press Track 1 or 2 to select A and its recording/loading lane. Load or record material, then play the left half of the pads.
- Press Track 3 or 4 to select B. Load or record its material and play the right half.
- Press Capture (the broken-corner bracket button above Loop; button guide) to switch which side the parameter pages edit. Choose an engine and change its parameters. Playing the other side does not change editing focus.
- On the waveform screen, turn knob 8, BLND, to crossfade. Left is A, right is B. Hold Capture + turn knob 8 to reach Blend from any page.
Outside the clip and chain editors, Copy returns to Single and back to your last chosen dual mode. Single remembers its own engine and keyboard settings. Split and Shared Dual use the same A/B sound settings; changing the layout keeps those programs and maps Stack Start to the new lane range.
For four instruments with one lane and two voices each, see Quad mode.
Editing and playing
In Split, the focused side has inverted lane numbers: 1–2 for A or 3–4 for B, drawn black on white. The A/B heading stays fixed. Parameter pages show A or B before the page name; shared pages show FX. Capture changes focus on release, and each side remembers its page. In Split, Track selection also selects the owning side. The main encoder keeps its existing navigation functions.
Both instruments continue to play as you edit either one. At either Blend endpoint the hidden instrument keeps its playheads and timing, so bringing it back reveals where it has reached. Mute fades the focused side out without stopping its playheads. The waveform header shows MUT in place of a muted part’s engine name, and the footer explains how to unmute it. Mute is remembered when you leave and return to Split. Part-mode sample preview follows the destination part’s mute, level, and Blend. Direct preview is independent; see Sample preview. See Restore a silent part for a quick checklist.
In Split, Stack Start and scan paths cover the selected side’s two lanes. Their local positions 1 and 2 refer to physical lanes 1–2 on A and 3–4 on B. Cutups uses Lane and Advance within that same pair. Pressure and Loop Hold apply independently to each side; press Loop while the desired side is focused.
Each half has its own Pads & Scale and Amp Envelope settings. Shift + pad latches that side’s note. Slices use a 16-pad layout per side. Cues use the four pads in the bottom row of each half, giving four cues per instrument. Rolls capture only their own side’s combined stereo playheads, before its inserts and Blend.
Split pad colors: B’s idle pads use a dim teal tint; its scale roots use brighter teal. The startup footer briefly shows the installed version. This tint identifies the right-hand instrument even in Chromatic mode and appears as soon as Split is loaded. Active playheads, held-note brightness, stored cues, and rolls keep their usual status colors over the background tint. Unused rows in Cues remain off.
Waveform zoom
Each instrument’s two lanes show its own Position/Field window across the waveform width. POS moves that window and FLD changes its width; unused portions of the sample are cropped out. A and B zoom independently, so changing edit focus does not change either view. Turn knob 1 (POS) to move the focused pair’s window and knob 2 (FLD) to change its width. Capture changes editing focus while retaining both pairs’ windows.
Playheads and outgoing readers use the same window as their waveform. Simultaneous voices with different regions can widen a pair’s view to include sounding readers and release tails. When those readers finish, the view follows that part’s POS/FLD controls. Very narrow Fields enlarge the existing waveform overview, so less fine detail is available.
FX Sends
Hold Capture and press Menu, choose FX SENDS, then click the main encoder. The page has all four sends, Priority direction/depth and threshold, Blend Curve, and Blend. Delay and Reverb are shared stereo effects with independent send amounts from A and B; their MIX controls are on the Delay and Reverb pages.
Use the common A/B FX Sends control table for all eight knobs, including Curve and Blend.
Sends follow the instrument’s level, mute, and Blend. With Priority ROUT set to Dry + Sends, they also follow ducking. Existing echo and reverb tails continue after fading or ducking that side. If a return is off, the footer points to FX Pages. Each part’s output level is LEVL on knob 8 of its Engine parameter page.
Hear an effect immediately: From FX Sends, click the main encoder → open Delay or Reverb → set its lower-right MIX to 100% → return to FX Sends → play A and turn knob 1 (delay) or 2 (reverb). Play B and use knob 3 or 4. Keep Blend near the middle to hear both sides.
Find an effect page
From FX Sends, click the main encoder to open FX Pages. Turn to choose Priority Duck, Delay, Reverb, the focused part’s Color or Stereo / Rotary inserts, shared Tape, or Effect Order. Click to open. Up/Down also selects a menu item. Back returns from a page to the menu, and Back again returns to FX Sends. Menu returns to the waveforms. Capture still switches the part being edited; the menu labels show A or B for private inserts.
To change a part’s dry level, focus it with Capture, open its Engine parameter page, and turn knob 8 (LEVL). Waveform knob 8 stays assigned to Blend.
A/B Mix Status
The waveform heading adds a source-voice count after each engine abbreviation and a thin audio-activity bar underneath. For a larger view, use Capture + Menu → A/B Mix Status. Meters follow the private inserts, part level, mute, and Blend; they exclude shared effect tails and sample preview. Counts include releasing source voices, up to four per part. Rolls can produce activity without increasing the source-voice count.
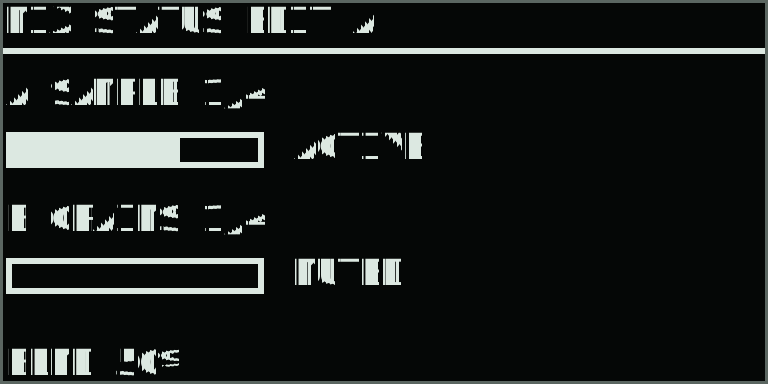
The A/B Mix Status reference explains every activity and silence indicator.
Capture changes editing focus from this view. Menu or Back returns to the waveforms. The page is a readout; levels and sends retain their existing control locations.
Restore a silent part
- Use Capture to focus the silent side. Inverted lane numbers 1–2 identify A focus; 3–4 identify B focus.
- If its header says
MUT, press Mute. On Dual Setup,MUTEshould read Off. Leaving and returning to Split preserves mute. - Set waveform knob 8,
BLND, near the middle. CheckLEVLon knob 8 of that part’s Engine page; 1.00 is a useful starting point. - On Mix / Rec, check that its two lane gains are raised and its lanes contain audio. For browser audition, also raise knob 8,
PREV. - If only the effects are missing, open Capture + Menu → FX SENDS and raise the part’s send. Click for FX Pages, open Delay or Reverb, and raise its MIX return. Return levels do not silence dry notes.
While a clip plays, a live change to Blend, a part level, a send, or Curve overrides that parameter’s recorded movement until playback restarts or another clip launches. Keep a correction by recording it in an overdub. Part-mode browser preview follows the destination part, including its level, mute, and Blend; see Preview routing.
Dual Setup
Open Capture + Menu → Dual Setup to change mode or editing focus, copy the focused sound settings to the other part, or change its mute. See the common Dual Setup control table. Shift + Copy performs the same settings copy directly; samples, cues, recorded notes, and the destination’s mute stay in place.
Part inserts and shared effects
Each side passes through its own Part Color page (Tone, Drive, Bits, Rate), followed by its own Stereo / Rotary page. These settings belong to that instrument. The insert order is fixed.
The two instruments then meet at Blend and feed the shared delay/reverb sends. Tape processes the combined stereo signal. FX Order lists Delay, Tape, and Reverb: move Tape before both returns, between them, or after both to choose which tails receive tape processing. Delay and Reverb use parallel sends; swapping only those two does not feed one into the other.
The full control descriptions, including Priority Duck, remain in the Effects reference. Delay and Reverb MIX set their shared wet return levels. The master compressor and limiter remain after the combined effects. If Tape Inertia is enabled, Loop’s transport gesture affects the shared Tape path.
Record, recall, and copy performances
Performance Record captures both sides together: notes already held when recording starts, subsequent notes and pressure, each side’s engine/inserts and stack holds, the shared sends, and Blend. Overdub adds a take. Finish recording with Record, then use Delete + Record to remove the newest take while the loop can keep playing. See Overdub undo. Clip Rate changes the speed of the combined performance.
Each clip stores its mode, both instrument setups, shared effect settings, and four source assignments. It also remembers the last chosen dual layout while Single is active. Existing Single/Split saves load normally. Before upgrading, export a backup of your set; sets saved by the current version require 0.29.0 or newer. Clip selection and chaining recall that complete setup. Audio recording, input source, monitoring, tempo, and transport remain shared. Select a Track lane before capturing audio; newly recorded audio becomes that lane’s source as usual.
Mix over a playing clip
During loop playback, moving Blend, a part level, a send or Curve takes control of that parameter until you restart playback or launch another clip. This lets you restore an instrument even if recorded mixer automation had silenced it. Record the movement into an Overdub take when you want to keep it.
PERF LOOP and Overdub Takes are shared pages for the combined performance. Changing edit focus does not create a separate recorder. Per-part Pressure is on Pads & Scale, knob 6; Quad reserves it. See Performance Loop controls.
External MIDI
In either dual mode, musical MIDI channel 1 addresses A and channel 2 addresses B. Notes, note-offs and pressure follow those channels without changing editing focus. The next-release NRPN map uses channels 5 and 6 for A/B parameters and 16 for shared controls. The E16 Remote Engine page shows A above B. Hold E16 Shift and turn encoder 1 to change its engine and effect pages. See MIDI control for setup and high-resolution control.
Eight source voices remain the overall budget, divided four per side. Dense Weave or Wavesets settings and stereo effects still share Move’s processor. Check Shift + Menu’s render and work counters while testing your most demanding combination.